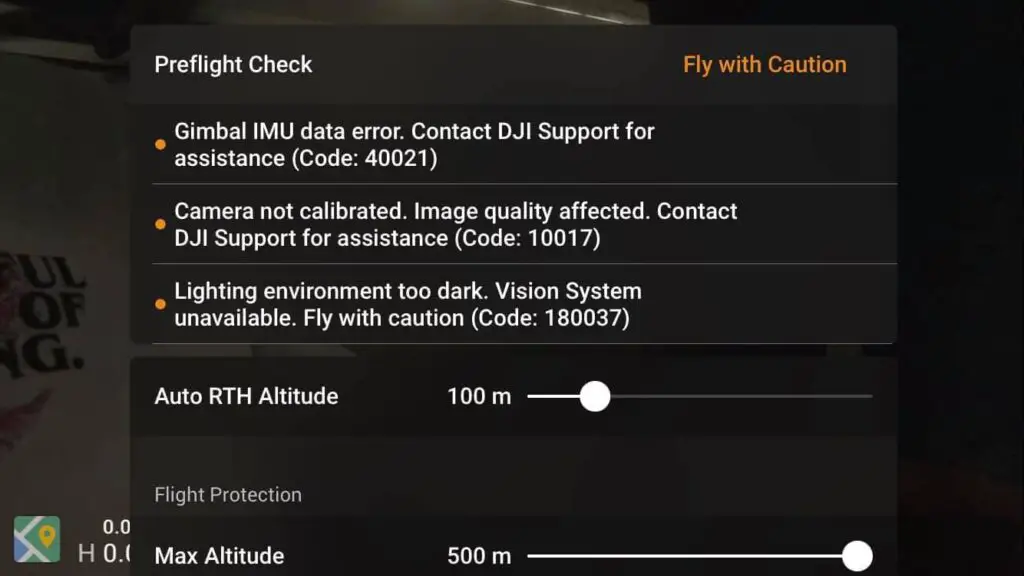
2 Ways to Fix Gimbal IMU Data Error (40021)
*In this article I will show you how you can fix “Gimbal IMU Data Error” however be a little complicated if you are not a techie person, but it can save you a lot of money and it is the only thing that will help you with this unless you send it to DJI, so stick on*
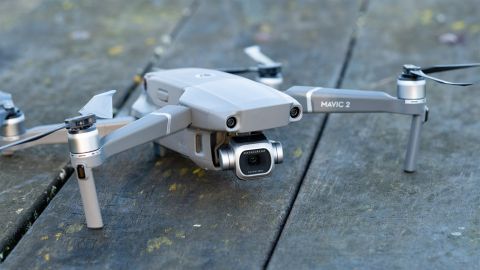
So, I crashed my Mavic mini a few weeks ago and the gimbal got damaged, then I bought a genuine replacement from Alibaba and replaced it.
Then when I was about to fly it I get this error “Gimbal IMU data error”.
After contacting DJI support, hours of frustration, and trying different things I finally fixed it and saved myself hundreds of bucks and so I thought I could do the same for others
First, if you don’t know what IMU is, it is a device that measures and reports the specific gravity and angular rate of an object to which it is attached.
Apparently, every gimbal has its own ID
And the id should match the rest of the drone’s components
So if the gimbal gets damaged you can’t change it without causing an issue.
The same happens if you replace the motherboard without the gimbal.
In other words, the IMU module data will have a hard time re-pairing with the new gimbal/camera you changed. That’s because DJI locks down their gimbals (and other components). so you can physically replace the gimbal, but it requires “activation” from the factory.
Apparently, DJI has special software called Repairtool that is used to pair the Camera ID with IMU, but it is not available to the public.
It took me ages to understand this, and when contacted DJI support team they said “contact our DJI Support Team to start up a ticket for us to diagnose the cause of the issue and a proper resolution will be provided“
And then they are going to charge me hundreds of dollars for a software problem, and so I said “no sir”
NOTE: in some cases, this error can be caused by an abstraction of the gimbal, in that case you need a professional.
First method
What I am about to show you is how you can calibrate your gimbal so you can get rid of the error and fly without any problem, however, it is impossible to pair the gimbal with the drone unless you send it to DJI.
- Download dji Assistant 2, python for windows, python pyserial and pyserial-3.5.tar
- Extract pyserial and DJI tools to a folder C:/DJI/
- Open “command prompt” as administrator then leave it open
- Connect your drone to your computer with the provided cable
- The SERIAL PORT COM will come for 15 seconds and will disappear from Device Manager
- So, as soon as it appears in Device Manager, Launch Assistant 2
- The Mavic mini will appear in Assistant 2
- It will automatically use the number of SERIAL PORT COM
- (you can change the firmware if you want)
- Close Assistant 2
- finnaly type your command
Commands are (you can copy in order not to mistake, just place your serial port number)
python comm_og_service_tool.py com(your number, for example com3) SPARK GimbalCalib JointCoarse.
Second method- roll back to previous firmware
Firmware rollback or downgrade refers to the process of uploading older versions of the software that operates your drone.
Now what I am basically about to show is how to roll back the firmware and reset the gimbal. it can seem a bit complicated but it is easier than the previous method” if you can watch the video below where I will show you how I did it step by step.
If this method is too complicated, you can also downgrade the firmware in the DJI assistant 2 or go 4 app and try to calibrate the gimbal, the success rate is low because DJI updates the older versions too.
1- Go to drone-hacks.com
Go to your browser and type drone hacks and go to the first website, this website is handy to manipulate drone’s software, it is commonly used to Remove No-Fly-Zones, Altitude limits, and such kinds of things but it can also help to fix software problems like this
2- Download the software
There are three options to choose from: for mac, windows, and Linux. choose the one that is compatible with your computer and download it
There is no installation and no sign-up required.
3- Connect your drone to your pc
Just connect your drone to your pc with the provided cable.
The software will be able to recognize the drone. If not restart the drone and connect it again.
4- Click hacks/flash firmware tab
click hack/flash firmware under that tab you will find “download firmware” click it and it will automatically lead you to the download page.
- Download firmware
The software will automatically choose the latest firmware for you, however, we don’t want that so change it to V01.00.0302 that is the version that we are going to use to fix “Error Code 40011” after choosing that version go ahead and download it.
6- Install the firmware to the drone
Go to the folder where you downloaded the firmware and choose it and wait for 5-10 minutes then you are done! you can now close the software.
7- open dji go 4 app
The error will still be there, don’t worry yet!
Go to settings, under control, click center gimbal and your drone will calibrate it will take a minute or two, and hopefully the problem will be fixed.
Note: make sure your drone has a full battery before this process
*Note: before firmware update make sure all your drone, controller, and phones battery are fully charged because it can take up to 30 minutes*
Final choice
If none of this seems to work contact DJI support.
they have special software they will run on the drone that will automatically connect the gimbal with the motherboard which will fix the problem
if the drone is within a year period from activation or if you have DJI care you can get it fixed without any cost. If not you might have to pay from $99 up to $350.
After you hand it to DJI it can take up to 15 days till they fix it and send it back to you, and it can take longer if you don’t live in the united states
If you are located in Armenia, you may contact the local dealer or DJI’s support via email to start a case and send the unit back.