5 Ways to Fix Incompatible Firmware Version- Error 30224
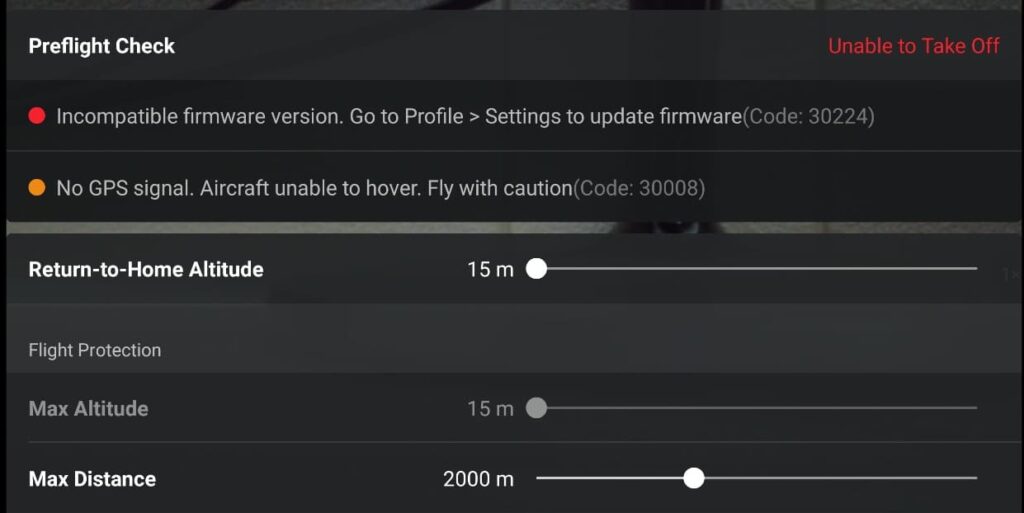
I got an “Incompatible firmware version. Go to Profile > Settings to update firmware (Code: 30224)” error on my Mavic mini a couple of weeks ago, it didn’t cause any trouble but it didn’t let me take off which is weird because my firmware is the latest version and I have been using the same firmware for weeks.
When I contact DJI support they didn’t seem to know what the issue was, however, after trying different things by myself, I fixed it and saved myself hundreds of dollars, and so I thought I could do the same for other people.
So how can you fix this problem?
To fix “Incompatible Firmware Version error” connect your drone to DJI assistant 2 and do a firmware refresh with each battery you have. you can also do a factory reset which will wipe everything from the drone and give you a clean start.
If you are getting this issue on Mavic mini 2 and you have a mac laptop since it might not be not compatible with it, you can try clearing the cache in the DJI go 4 app and restart both the controller and drone then reinstall the database update
90% of peoples’ problems will be fixed just by refreshing the firmware, so let us start with that-
1. Refresh firmware in DJI assistant 2
To refresh your drone’s firmware-
- Power on the drone
- Connect it to your computer using the USB cable DJI provides
- Open the DJI Assistant 2 software on your laptop
- Log in to the DJI Assistant 2 app and select your drone
- Next, you will see the firmware version
- Tap update and choose the latest version
- If it is already the latest version click refresh
- Repeat process with other batteries(if you own one)
2. Update/refresh Controller Firmware
The Drone’s and the controller’s firmware must match so after refreshing or updating your drone’s firmware you should do the same for the controller.
so to update/refresh your RC’s firmware-
- Power on the remote controller
- Connect it to your computer using a USB cable provided
- Open and log into the DJI Assistant 2 software on your laptop
- Select your drone’s remote controller
- Next, you will see the firmware version
- Tap update if you have an older version or tap refresh if it is up to date
- Click on “Start Update”
- On the next screen, you will see the firmware being downloaded, then transmitted and updating the remote controller
- At 100%, you will see the message, “Update Complete”
- After the firmware is complete, the controller will restart automatically
3. Downgrade firmware
If refreshing the current firmware doesn’t seem to work, you can downgrade the firmware till the next update comes out
You can downgrade your firmware both in DJI assistant and DJI go 4.
To downgrade firmware in DJI assistant–
- Power on the drone
- Connect it to your computer using the USB cable
- Open the DJI Assistant 2 software on your laptop
- Log in to the DJI Assistant 2 app and select your drone
- Next, you will see the firmware version and older versions lined up
- Choose the version one below the current version you have
- Then click install
- Then the drone will automatically restart
To downgrade firmware in DJI go 4
press and hold the menu icon (three horizontal lines in the top right corner) for five seconds and a special firmware menu appears. You can now select which previous firmware version you would like to downgrade to. Check it out.
It is better if you downgrade with DJI go 4 because the controller will follow automatically.
If you downgrade in DJI assistant you most likely have to do the same with the controller
4. Clear cache
Clearing the cache is probably the easiest way to fix this problem but the success rate is low
To clear cache go to DJI Go 4 app, click on the settings three dots, under “General Settings” you can see the video cache settings. You can select to “Clear Video Cache” here and free up a lot more space on your device.
If none of the methods above work for you, your last option is to factory reset your drone.
5. Factory reset
- First, Install the DJI Assistant 2 Program on your device, make sure you download the proper one.
- Connect your drone to your laptop using the USB cable provided, and wait for the software till it to detect your drone
- You’ll be able to see your drone on the Connected Devices screen. Select your drone and then click on confirm.
- Click on Firmware Update. After that, you’ll be able to see the “Restore factory defaults” button.
- Click on the factory reset button and then confirm when you are asked to confirm the reset. A progress bar will pop up showing the progress of the reset. You’ll be notified when the reset is complete.
Note: After a factory reset you have to calibrate everything again.
finnaly hard reset the controller
To reset the RC: Turn on the controller, the aircraft should be off. * Press C1, C2, and shutter (top right button nearest antenna) on the controller and hold for about 2 seconds or so until it beeps (D-DDD), then turn the controller off.”
Final choice
If none of the methods fix it you need to send it to a professional.
If your drone is within a year period from activation or if you have DJI care there is a good chance you can get it fixed without any cost.
If not you might have to pay from fifty dollars up to hundreds of dollars depending on the situation
After you hand it to DJI it can take up to 15 days till they fix it and send it back to you, and it can take longer if you don’t live in the united states
If you are located in Armenia, you may contact the local dealer or DJI’s support via email to start a case and send the unit back.