9 Things to try if quick shots disappeared on Mavic Mini 2
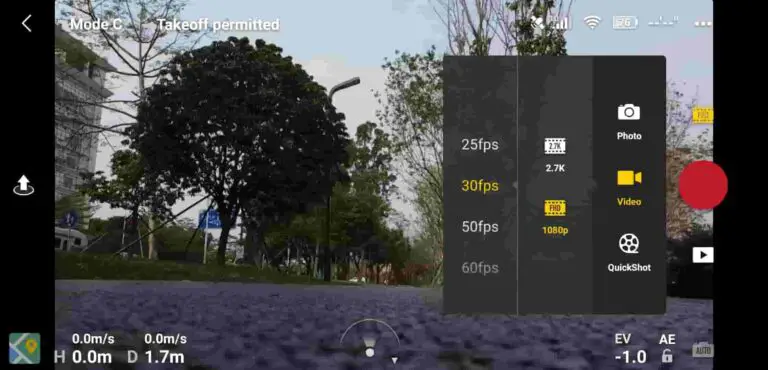
Now there has been this issue where one of my favorite features quick shots has completely disappeared from the menu on Mavic mini 2(only video and photo mode showing) if you don’t know what quick shot is, it is an autonomous flying feature with different flight settings and a nice video editing software afterward.
So I went on the internet to find a solution but no one knew what the problem was, then I contacted DJI but they didn’t provide me any help, anyways after reading some forums, and reading the manual that came with my mini 2 I found out what the issue was, ironically it very easy fix and so I thought I could share the information
So why is this happening and how do you fix it?
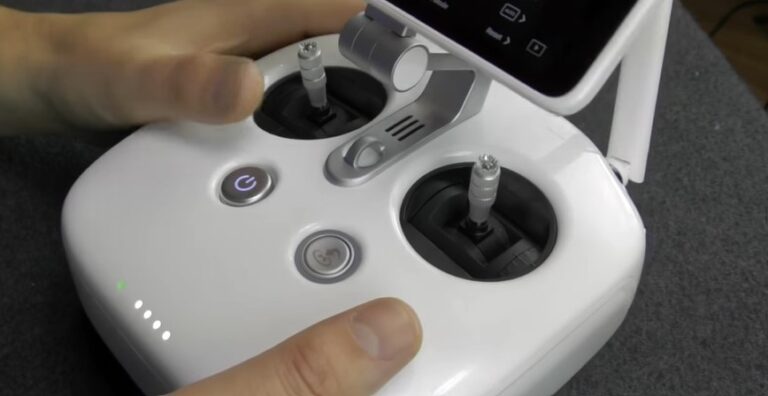
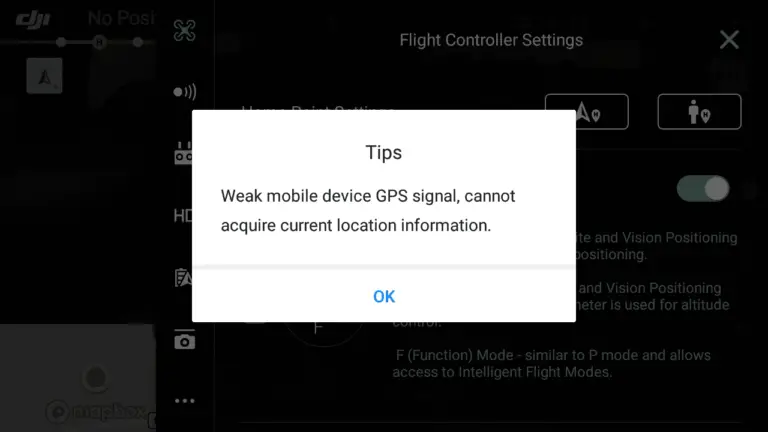
If “quick shots” is not appearing on your Mavic mini 2 it can be because you are in sports mode, there is no strong GPS signal, you don’t have an SD card installed, or the sd card has a wrong file format. Also, try refreshing your controller’s and aircraft firmware in DJI assistant or do a factory reset if nothing seems to work.
To explain each of them in detail
- Turn off sports mode- To allow more controlled autonomous flight you have to disable sports mode or the software won’t allow quick shots and some times other functions such as active tracking
- Weak GPS signal- for the drone fly autonomously on a fixed object it needs good GPS and many satellites, if that is lacking quick shots will not work
- SD card- and finally if you have not inserted an sd card, or if you have a wrongly formatted sd card once again quick shots mode will not work
1. Wrongly formatted SD
If you have inserted an SD card but the drone doesn’t seem to recognize it you need to format it in exFAT
To do that-
- Insert the SD card in your computer
- Open File Explorer.
- Under the “Devices and drives” section, right-click the SD card and select the Format option.
- Use the “File system” drop-down menu and select the exFAT option.
- This process can be a little different on Mac and Linux.
2. Reinstall DJI FLY
One of the troubleshooting methods DJI support recommended me is to reinstall the DJI go app and that is what helped me to solve the issue.
However there is one key thing they didn’t tell me and that is to restart my iPhone after deleting the app from my phone, I got that info from a forum. so anyways follow these steps.
- Remove the DJI GO app from your phone
- Restart your iphone
- Reinstall DJI GO app from app store/playstore
3. Refresh firmware in DJI assistant 2
- Power on the drone
- Connect it to your computer using the USB cable DJI provides
- Open the DJI Assistant 2 software on your laptop
- Log in to the DJI Assistant 2 app and select your drone
- Next, you will see the firmware version
- Tap update and choose the latest version
- If it is already the latest version click refresh
- Repeat process with other batteries(if you own one)
4. Update/refresh Controller Firmware
The Drone’s and the controller’s firmware must match so after refreshing or updating your drone’s firmware you should do the same for the controller.
so to update/refresh your RC’s firmware-
- Power on the remote controller
- Connect it to your computer using a USB cable provided
- Open and log into the DJI Assistant 2 software on your laptop
- Select your drone’s remote controller
- Next, you will see the firmware version
- Tap update if you have an older version or tap refresh if it is up to date
- Click on “Start Update”
- On the next screen, you will see the firmware being downloaded, then transmitted and updating the remote controller
- At 100%, you will see the message, “Update Complete”
- After the firmware is complete, the controller will restart automatically
5. Downgrade firmware
If refreshing the current firmware doesn’t seem to work and the issue doesn’t seem to go, you can downgrade the firmware till the next update comes out
You can downgrade your firmware both in DJI assistant and DJI go 4.
To downgrade firmware in DJI assistant–
- Power on the drone
- Connect it to your computer using the USB cable
- Open the DJI Assistant 2 software on your laptop
- Log in to the DJI Assistant 2 app and select your drone
- Next, you will see the firmware version and older versions lined up
- Choose the version one below the current version you have
- Then click install
- Then the drone will automatically restart
To downgrade firmware in DJI go 4
press and hold the menu icon (three horizontal lines in the top right corner) for five seconds and a special firmware menu appears. You can now select which previous firmware version you would like to downgrade to. Check it out.
It is better if you downgrade with DJI go 4 because the controller will follow automatically.
If you downgrade in DJI assistant you most likely have to do the same with the controller
6. Recalibrate the compass
Recalibrating compass and IMU can also be very helpful for an autonomous flight so try doing those
- Turn on your Mavic Mini and the DJI go 4 app in the Remote Controller.
- Go to the menu in the top right corner.
- Then go to the drone tab on the top left.
- Go to Advanced Settings at the bottom.
- Then go to Sensor State.
- Select “Compass” in the top middle.
- And tap “Calibrate Compass”.
- Then follow the onscreen instructions.
7. Calibrate IMU
After compass calibration calibrate the imu.
- Go to an open area outside, away from metal structures, cars and such.
- Turn on your Mavic Mini and the DJI go 4 app in the Remote Controller.
- Tap on the 3 dots in the top right corner.
- Tap on “Safety”.
- Scroll down to the “Sensors” section.
- Select “Calibrate” to the right of the Compass.
- Click on “Start”.
- The status indicators lights will blink yellow indicating that the calibration is about to start.
- Then follow the onscreen instructions.
- Hold the aircraft horizontally and rotate it 360 degrees in the clockwise direction.
- When the Mavic Mini indicator light changes from yellow to solid green then move on to the vertical calibration.
- Hold the Mavic Mini vertically with its nose pointing upwards and rotate it 360 degrees around its vertical axis.
- The Mavic Mini indicator will turn from yellow to solid green when successful.
- When both horizontal and vertical compass calibration is completed successfully, the indicator light will start flashing green.
8. Clear cache
To clear cache go to DJI Go 4 app, click on the settings three dots, under “General Settings” you can see the video cache settings. You can select to “Clear Video Cache” here and free up a lot more space on your device.
If none of the methods above work for you, your last option is to factory reset your drone.
9. Factory reset your drone and controller
If nothing seems to fix the quick shots try factory resetting your drone
- First, Install the DJI Assistant 2 Program on your device, make sure you download the proper one.
- Connect your drone to your laptop using the USB cable provided, and wait for the software till it to detect your drone
- You’ll be able to see your drone on the Connected Devices screen. Select your drone and then click on confirm.
- Click on Firmware Update. After that, you’ll be able to see the “Restore factory defaults” button.
- Click on the factory reset button and then confirm when you are asked to confirm the reset. A progress bar will pop up showing the progress of the reset. You’ll be notified when the reset is complete.
Note: After a factory reset you have to calibrate everything again.
Finnaly hard reset the controller
To reset the RC: Turn on the controller, the aircraft should be off. * Press C1, C2, and shutter (top right button nearest antenna) on the controller and hold for about 2 seconds or so until it beeps (D-DDD), then turn the controller off.”